Behringer is definitely one of the well-known companies in the music society founded back in 1989. Behringer is owned by Music Group holding company which collaborates with other audio equipment companies such as Midas, Bugera, and Turbosound (ex Harman).
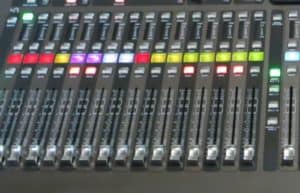
Midas is the main reason why Behringer’s X32 digital console is so popular. X32 has legendary Midas preamps on its channels. This is the main reason why this digital mixer is so desired. Many users also easily fall in love with the design and functionality of this soundboard. Behringer has definitely nailed it with this product. It is clearly a “must-have” digital mixer.
If you are planning to buy the X32 mixer, trust me, you won’t regret it. But if X32 is going to be your first digital sound console, take a deep breath, and start learning. Don’t be afraid, it is not as complicated as it looks like. Probably, from my own experience, you will have the most difficulties with inserting effects. You can do it on board, and remotely, with the app. But first, let me introduce you to some of the X32’s effects with which you’ll be able to improve your mix. You might be interested in reading my post with a list of X32 effects.
Compression and gate
This mixer has compression and gate on each channel. Using these features, the X32 will process your audio signals, enabling you to control the dynamics of any microphone on stage, reduce tails of singing drums, reject noises with gate, and make a full, rich sound by applying compression on vocals, bass, and drums. Besides the gate and compressor, there is also 4-band parametric EQ available on every chan. The possibilities with this feature are unlimited. You will be able to fine-tune any undesired frequency on each input and take control of annoying feedback.
The Behringer X32 has a number of amazing built-in effects which sounds absolutely wonderful. They are all pretty much simulations of legendary FX units such as Lexicon, Universal Audio, Quantec, Roland Dimension, MiniMoog, TC Electronic D-Two, Pultec, SPL Transient Designer, Fairchild, Teletronix, Urei, Aphex, Sonic Max.
I should point out that there are 8 slots for using these built-in effects. The first 4 of these 8 slots are for both, aux sends (Side-Chain) or channel inserts. Another 4 slots are channel inserts only. Simplified, you get 4 stereo Side-Chain bus FX channels only. But, I think that should be enough to work with.
If you intend to access and apply either of the Behringer X32 amazing effects you’ll need to take a couple of steps. As we mentioned before, you can use its effects in any one of two ways: Side-Chain (also known as “Effects Loops”) and insert effects method.
Side chain method is the approach when several channels are fed by a mutual effect. This method is usually used for reverb, delay, flanger, phaser, etc. The advantage of this method is that the selected effect can be distributed to each channel independently with the BUS effects send control.
Insert method is when the desired effect is embedded in one (single) channel. For this kind of method, the best example of usually preferred effects is a graphic equalizer, Limiter, deEsser, Mood Filter, Exciter, etc.
Applying the “Side-Chain” method:
After pressing the “Effects” button at the upper right side of the mixer, on the console’s display, there will be the effects home tab where various built-in effects can be distributed to the eight slots. Remember, for the side-chain method, only the first four slots can be used.
Use rotating dial knob 6 to navigate the effect processor you want. Choose one of the slots from the left side (1-4). Turn the rotating knob 1 and rotating knob 2 to choose BUS for the source input of that processor you intend to use. To choose a particular built-in effect like reverb, delay, etc. you need to use knob 5.
At the left edge of the mixer, right next to the faders, there is a button named “Effects Returns”. In the primary settings, returns are linked and sent to the main L/R BUS. Also, after pressing “Effect Returns”, you should bring FX1/L and FX1/R fader to 0 dB. Of course, you will be able to send these effects to the other BUSes, also. For that purpose, push the “Home” button (upper right corner, next to the display) while the “Effect Returns” is selected.
After that, with the “Page Select” buttons (right/left arrows) go to the “Sends” window and set the levels which will be sent to the other BUSes. Now get back to the “Effects” window tab on the display, push the “Page Select” arrow button, and navigate to the editor tab for the selected effect. Once, after the effect editing tab is displayed, use the rotating knobs to modify the effect which will suit your style and need. Read more about connecting aux send and return on a mixer.
To use that effect on other input channels, you should select the one you want and then regulate its “Bus Send” rotating dial to your preferred spot. When the BUS send level is raised, more amount of the chosen channel audio input signal will be given to the selected effect. Repeat the same routing method with any other channel you want to send to the chosen effect.
Applying the “Insert” method:
As mentioned, applying the effect with this method is possible within all eight effect processing slots. But it is recommended to use the slots from the right side (5-8). Insert method is less complex than side-chain and usually the first choice when you take a look at the effects screen for the first time.
Same as for side-chain method, after pressing the “Effects” button at the upper right side of the mixer there will be the effects home tab shown. Use rotating dial knob 6 to navigate the effect processor you want. Choose one of the slots from the right side (5-8).
Turn rotating knob 1 and rotating knob 2 and choose “Insert” as the source for the left as well as for the right input. To choose a preferred built-in effect like Limiter, Mood Filter, Graphic EQ, etc. you have to use knob 5.
Select the particular channel on which you want to use that effect. After pressing the “Home” button you should navigate to the chosen channel’s “Config” tab with the “Page Select” arrow button. Turn rotating knob 6 to choose the particular slot you inserted the effect and press that knob to connect the chosen effect. That would be it. Now, the effect is dedicated to a selected channel. Insert can be also applied to the main L/R.
Digital mixers from Behringer’s family X32 and X Air are equipped with more than 60 high quality effects which can be assigned to any channel.
Effects list
Reverbs
- Hall Reverb reproduces the sound like it was recorded in medium to large size hall.
- Ambiance Reverb aims to form the illusion of a room’s acoustic ambiance. They are usually very short and discrete.
- Room Reverb is the most basic type of reverb which gives a natural color and liveliness to a sound.
- Chamber Reverb is simulating reverberation of the chamber which made out of brick, stone, concrete or some other solid material.
- Plate reverb is one of the first types of synthetic reverb developed. It is excellent for adding brightness to an instrument.
- Vintage Reverb is inspired by the Universal Audio EMT250 FX unit.
- Vintage Room Reverb reproduces room reverb which is inspired by Quantec ORS FX unit.
- Gated Reverb is a combination of reverb and gate. It allows you to limit the tail of reverberation and cut it at a certain point. Great for drums.
- Reverse reverb also called reverse echo effect, will simply take the reverb tail of audio signal and reverse it. Really cool effect, but tricky for live performance. Read more about reverb settings for vocals.
Delays
- Stereo Delay gives individual setting of left and right echo time and low/high pass filters. Using the stereo delay will provide you with wide sound in the stereo mix.
- Triple Delay, also known as a 3-Tap Delay, will provide you with three delay steps with individual controls for frequency, gain, and pan.
- Rhythm Delay, same as 3-Tap Delay, will provide you with individual frequency, gain, and pan controls but with four delay steps.
Others
- Stereo Chorus can make a single audio input sound like two sounds being played simultaneously. It will add a rich, sparkling quality to your sound.
- Stereo Flanger produces sound by mixing two identical signals together and simulates phase shifting.
- Stereo Phaser is filtering a signal by creating a series of peaks and troughs in the frequency spectrum which makes a sweeping sound.
- Dimension C is based on Roland Dimension D which lightly detunes audio signal, blends it with the primary and makes some kind of fat but bright sound.
- Mood Filter is motivated by the MiniMoog and usually used to imitate the real sounding of acoustic instruments. This filter has an LFO generator. Read about what the HPF setting is for.
- Rotary Speaker imitates the sound of a legendary Leslie rotating speaker creating a psychedelic sound.
- Tremolo/Panner will manipulate your signal’s volume and pan and modulate your sound with speed, phase, wave, and depth controls.
- Suboctaver will mix the input signal with a synthesized signal which musical tone is one or two octaves lower. Can make your kick sound really big and powerful.
- Wave Designer is a great effect for setting signal dynamics.
- Precision Limiter will reduce the dynamic range of a signal that passes through it. It will completely prevent a signal from going over a specified level.
- Stereo Imager is usually used to manage the position of the audio signal in the mix.
- Edison EX1 is a simulation of Behringer Edison EX1 Stereo image processor.
- Sound Maxer inspired by Sonic Maximizer 482i will make your signal become more powerful, brighter and louder.
- Dual Graphic EQ/ Dual Tru EQ/ Stereo Graphic EQ/ Stereo TruEQ
- Dual deEsser/ Stereo deEsser will help you reduce excess sibilance from vocals.
- Stereo Guitar Amp/ Stereo Guitar Amp will simulate the sound of an audio signal plugged into a real guitar amplifier.
- Stereo Tube Stage/ Dual Tube Stage simulates a diversity of modern and classic tube preamps.
- Dual Pitch Shifter/ Stereo Pitch will change your original pitch.
- Stereo Xtec EQ1/ Dual Extec EQ1
- Stereo Xtec EQ5/ Dual Xtec EQ5
- Stereo Combinator/ Dual Combinator
- Stereo Fair Comp/ M/S Fair Comp/ Dual Fair Compressor
- Stereo Leisure Comp/ Dual Leisure Comp
- Stereo Ultimo Comp/ Dual Ultimo Comp
- Stereo Enhancer/ Dual Enhancer
- Stereo Exciter/ Dual Exciter
Combined Effects
- Delay + Chamber
- Chorus + Chamber
- Flanger + Chamber
- Delay + Chorus
- Delay + Flanger
Reference: https://en.wikipedia.org/wiki/Reverberation
Leave a Reply