Whether you’re on stage or in the studio, whether you’re micing a singer, acoustic guitar, guitar amp, or drums, how to keep background noise on a mic to a minimum is very important. Not every microphone is the same, not every room is the same, not every performer is the same. That’s why we will give you several tips for live performance or when recording music, whether you use dynamic mics or condenser mics. To eliminate this problem on a microphone: you need to remove ambient noise sources. Start reducing the problem from the very first sound source – your microphone. Here are 9 ways it can be done –
1) Sensitivity And Gain Setup
Microphone sensitivity is very important when choosing the right mic for your needs. Usually, it’s measured with a 1 kHz sine wave at a 94 dB sound pressure level (SPL).
You should know that some types are more sensitive than others and the audio quality of it is not really related to their mic sensitivity. Once exposed to the same sound source, various microphone models might generate totally different output levels. A measure between the microphone’s noise level, clipping point, distortion, and sens defines whether or not a microphone may be a good fit for a specific use. A microphone with high sensitivity might require less preamp gain. Also, it may have less headroom before clipping than a mic with lower sensitivity. It’s also worth keeping in mind that your end result will depend a lot on microphone quality. If you start with a poor mic, no amount of filters or processing is going to make it any better or help you suppress intermittent background noise and cut out static.
Dynamic microphones generally have a very low sensitivity while condenser microphones usually have a higher sensitivity. The signal level may be easily adjusted to the desired input level with the proper mic preamplifier gain. Be aware that each gain stage will include some noise into the signal. It’s up to you or your audio engineer to make sure that every gain level is good enough to keep its input noise from corrupting the signal. Proper microphone gain setup should keep noise out of your output. Set the correct input level of your sound source and use balanced audio connections, to prevent the reasons the reasons why a mic would pick up sounds in the background.
If your mixing desk or audio interface has a microphone boost option, try turning that off, or all the way down to reduce noise.
Keep environmental noise out of your live performance or audio recording with advanced equipment.
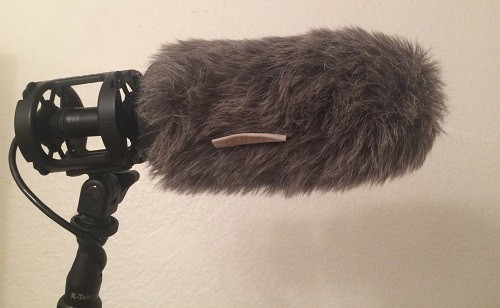
2) Windshield (Windscreen)
Foam or fur (Windjammer); actually the combination of these two products is great for blocking the noises produced by the wind. It should be placed over the microphone’s head. These “dead cat” designed accessories will prevent wind interference as well as heavy breathing and popping. These windshields offer up to 12dB wind suppression. All the windscreens would slightly reduce the total level of the microphone volume and selectively lower the level of higher frequencies. However, they achieve this with less audio interference from the ambient air and any microphone you use with a windshield will deliver a cleaner sound. Use it. Also, you may want to check out the Rode Rycote Shotgun Mic for outdoor work.
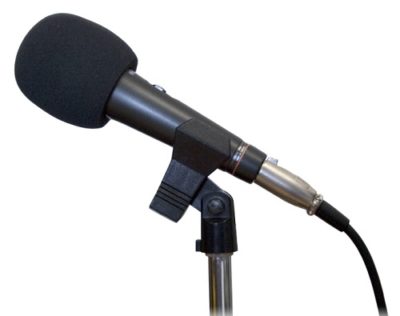
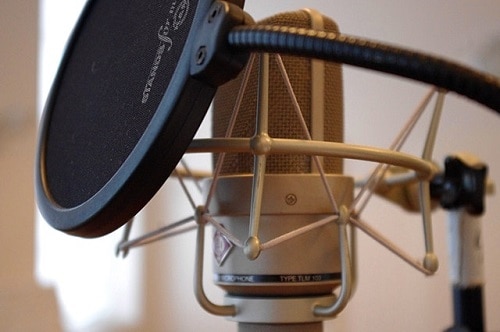
3) Pop Filter
If you want to avoid plosive and sibilance from your recording you should consider using pop filters for your microphones. It is generally not for outdoor use and you can see it is usually used in studio / home studio. It is a device that is placed between a singer / speaker and the microphone. A pop filter comes in a round disc looking object that should be mounted on a mic stand and has a flexible boom to place it exactly where needed. Looks like a big lollipop. This lollipop eliminates or reduces plosives so the microphone will not pick up an explosion of sound(popping) and will help against picking up noises from the background too. Also, it helps keep moisture off the mic, which is good for your equipment. Some microphones, such as the SM58 dynamic microphone have a built-in pop filter under the metal casing, which reduces this problem a little bit.
*Some microphones actually have a pop filter built-in, so you should do your research.
4) Shock Mount
Every modern microphone is very sensitive and prone to picking up background noise. Shock mounts are a great way to protect a microphone from shocks and vibration, and if you want the best possible performance and sound quality. They will effectively reduce microphone handling noise. Use shock mounts on mic stands to eliminate tremors and vibrations from the mic stand itself. People walking across the floor can also generate excess noise which a shock mount can help dampen.
#ad
5) Filters for Static, Hiss, Hum and Other Sounds
Filters will not change or add new frequencies to the input signal. They are often used to highlight the signals in certain frequency range and reject signals in other bands such as those associated with background noise and unwanted microphone sounds.
You should apply a high pass / low cut filter which removes low-frequency rumble and DC offset. Set the freq control at 10 Hz if you want to eliminate DC offset only. A harmonic notch filter cut at 50 Hz or 60 Hz will be able to ensure that AC hum is easily removed.
These are five basic types:
- Bandpass filter is used in audio systems to separate a signal within a band of frequencies from signals at other frequencies.
- Notch or Band-Reject is a filter with the opposite function of the bandpass. It is used to stop noise by removing an unwanted frequency from a signal while affecting all other frequencies as little as possible.
- Low-Pass filter permits low-frequencies and rejects audio signals above the filter’s cut-off frequency. They are used whenever high frequencies should be removed from a signal.
- High-Pass is the opposite of the low-pass filter, which rejects signals below its cut-off frequency. They are used in cases when the rejection of low-frequency signals is needed.
- All-Pass (or Phase-Shift) filter type has no effect on the amplitude of the signal. Its function is, without affecting its amplitude, to change the phase of the signal.
The most popular and can be found on any mixer is a low cut (high-pass) filter which reduces rumble from an audio or mic signal. Start from 20hz and go up until you find the sweet spot without affecting sound source. For example, for male vocals, you could go up to 100hz. For a female, up to 120hz. Experiment to achieve the best possible microphone noise suppression. If you want to remove static noise, these filters can be quite effective.
After we have applied the filters, if background sounds are still present, we should fine-tune the signal with the equalizer.
6) Equalization
What is the equalizer? An equalizer (EQ) is a software or hardware filter that adjusts the level of certain frequencies.
What is equalization? Equalization is optimizing frequencies of sound. Through the equalization process, we can increase or decrease the volume of the selected frequency, such as those that are coming from background noises from a mic.
Every sound has its frequency and certain ones are louder than others. Because of that, we use an equalizer to “equalize” these frequencies. This means that we will reduce signals that are dominant or increase those that are missing in order to achieve the best sound. Using Equalizer is quite easy, especially if it has its own analyzer. With the help of an analyzer, you can easily see which frequency is messing with your performance and reduce it.
If we’re talking about an audio recording for example, if that recording of your voice has the so-called white noise (hiss) and your analyzer shows the dominant frequency of 7khz, simply select and reduce it with your equalizer. You should be able to fix the microphone’s white noise and notice the difference instantly.
On the other hand, if we are talking about live performance, and you do not have a digital mix, you have to rely on your ears. Microphones placed wrongly on a stage will cause feedback issues and you may also have certain sounds that are more noticeable because of acoustic echo, but you can also use eq to try and resolve this with a process called acoustic echo cancellation. Acoustic echo cancellation can be achievable by using some skill with equalization. Practice identifying which frequency is accentuated or missing.
*Every audio engineer will tell you that the first thing you should try with EQ is to reduce the levels, not increase them.
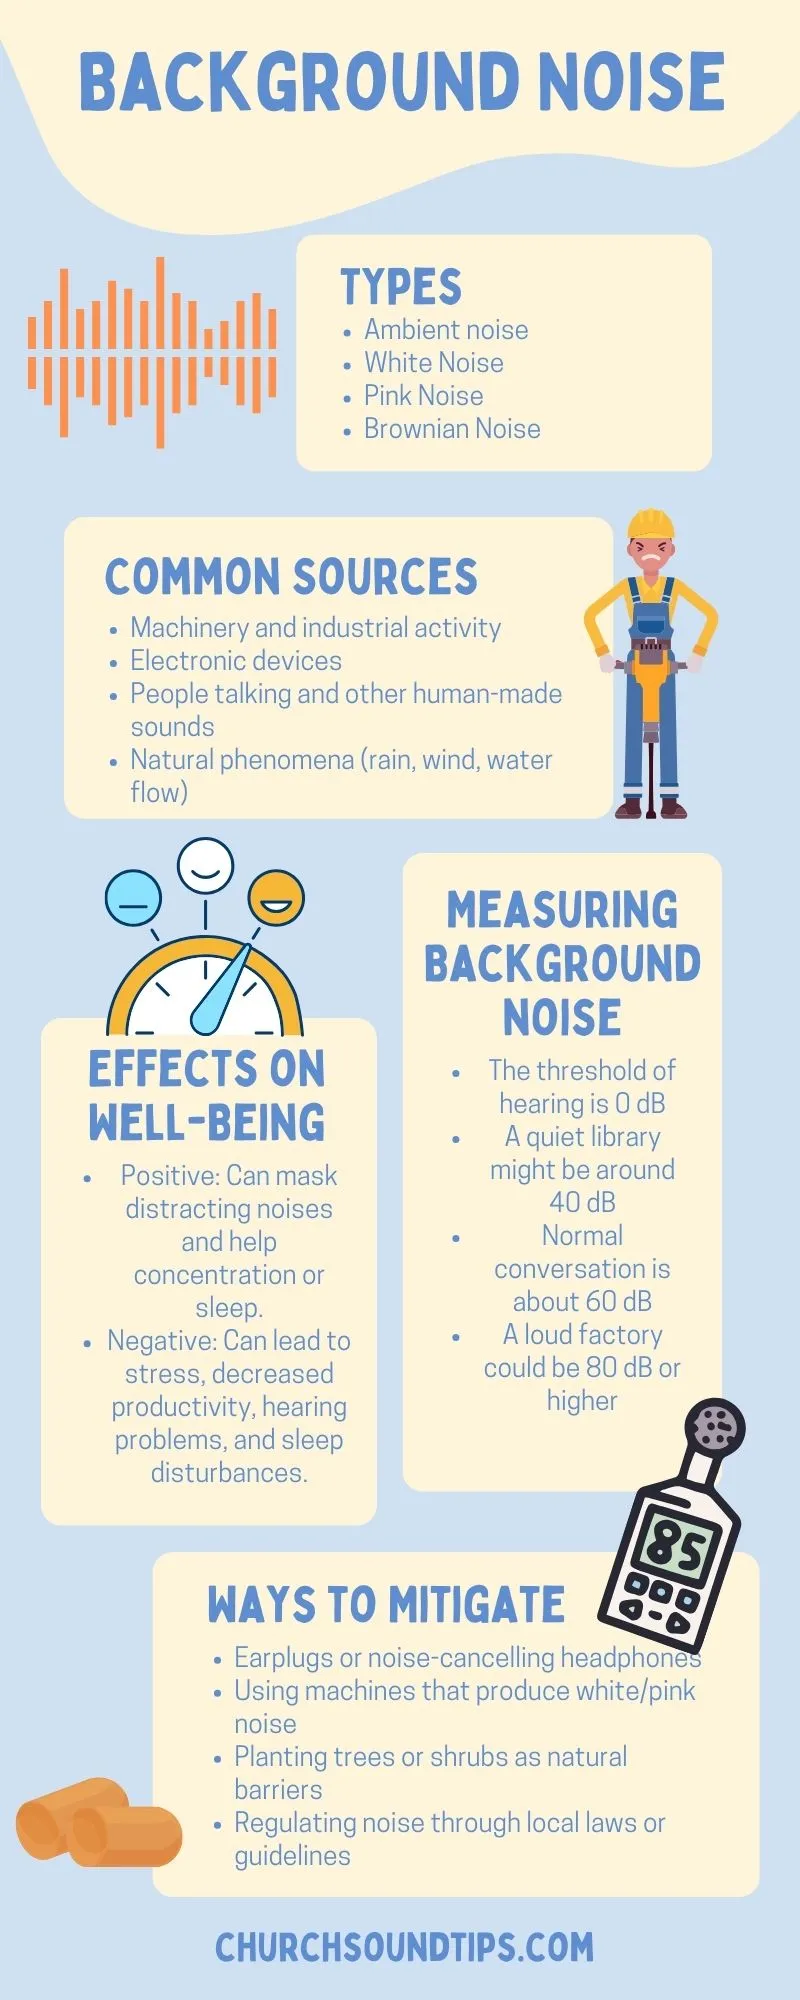
Table of common ambient sounds
| PC silent fan | 20-25 dB |
|---|---|
| PC performance fan | 30-35 dB |
| Barking dog | 85-120 dB |
| Snoring dog | 50-65 dB |
| Road traffic | 70-80 dB |
| Road traffic (windows closed) | 35-45 dB |
| Air conditioner | 60-65 dB |
| Telephone ringing | 70-80 dB |
| Computer keyboard | 50-60 dB |
| Computer mouse click | 50-75 dB |
7) Noise Gate
A noise gate is usually used for the reduction of unwanted external sounds and to help reduce background noise. It allows an audio signal to pass through only when it is above a threshold value. In other words, it is usually used when the level of the mic signal is above the level of the noise. If properly set, the gate will reduce steady static from the amplifier and hum from the power supply system and power cable without affecting the sound source. With very few adjustments, with the help of this device, you can stop the unwanted background sounds or static noise that your microphone picks up, either at the stage or in your home studio. If you are still getting mains hum causing audio interference, you could try changing over to another power socket.
8) Noise Removal Software
If you can’t find a better solution and you need the noise reduction software, be sure that the noise removal process must be carefully used as it can lead to a loss of audio data. Sometimes it is better to leave some noise in the recording than to remove a significant part of your audio material.
Audio noise suppression software helps remove unwanted noise from a mic signal. The goal of any noise suppression process is to take a noisy mic signal and isolate the clean sound signal from the noise.
There are a lot of noise-cancelling software plug-ins on the market. Basically, every plugin works according to the same principle. “Get noise print and – apply”. The difference is only in additional parameter settings. Some companies even offer full-featured DAW (digital audio workstations) for sound restoration. For example, well known Izotope, with its latest rx7 audio editor software for post production, offers a range of incredible possibilities for achieving professional sound. Worth every penny. The complete rx7 editor contains De-Noise, De-Click, De-Crackle, De-Hum, De-Plosive, De-Ess, De-Reverb, De-Rustle, De-Wind, Dialogue Isolate, Spectral De-Noise, Voice De-Noise, Mouth De-Click, EQ Match plug-ins and much more. Really amazing and useful stuff. Other companies that are also prominent with their audio restoration software are Adobe (Audition CC), Acon Digital (Acoustica 7, Restoration Suite), Audacity (free), Sonnox Restore, Waves, Antares (SoundSoap), Zynaptiq (Un-series), Sound Forge, Cedar Studio etc.
You can guess which one is most popular among audio hobbyists. You’re right, Audacity.
Audacity is actually a DAW(digital audio workstation), free audio editing software. It has a quite decent Noise Reduction tool plug-in, and it’s available for Windows 10, Windows 7, and Apple Mac OS and Linux operating systems. There are not as many advanced options as rx7, but it can do the job if you want to capture your performance and eliminate unwanted noise from your recording.
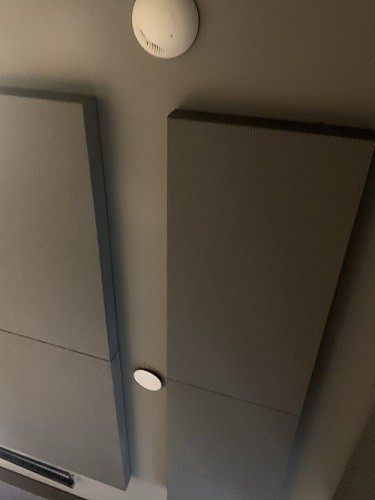
Acoustic panels
9) Adaptive Noise Reduction and Cancellation Technology
This method uses a reference audio input signal which contains only noise. This signal is transmitted through an adaptive filter and later decreased from the primary input. This effect can quickly reduce sounds from fans, air conditioners, background conversations, rain, wind etc. Basically, it is very useful for “live” (real-time) noise removal.
Every audio recording contains a certain amount of noise. To produce the best recordings, these unwanted sounds must be removed as much as possible. Until just a few years ago, this technique was a very difficult and expensive process. The new generation of high-speed computers equipped with quality sound cards and software has made audio noise suppression very easy. There is also the possibility of using a real-time noise-cancelling microphone. These cancellation filters are getting better as technology improves. If you enable noise cancellation, you will keep the mic background noise away from your live performances or studio recordings. At the very least, you will significantly reduce ambient noise in your output signal with this software. In the end, that’s the whole point, right?
Leave a Reply