This is one of the most common questions asked by both beginners and even more experienced sound technicians, whether working within churches or gig venues. An appropriate gain setting for all inputs may be an important factor in creating the most effective mix possible. this means that each one signals coming into the mixer are at equivalent levels. Setting the gain for every input channel appropriately ensures that no one input overwhelms the mixer. also ensures that rock bottom possible noise level is achieved from every input. The gain may be explained as mic’s sensitivity. It will increase the potency of what the microphone will pick-up/hear, and is used to manage the appropriate intensity of every instrument.
Things to Consider
-Too much gain and therefore the signal will clip and distort. insufficient gain and therefore the signal feels weak and noisy. You’ll be able to boost the fader up as high as you would like however if the trim is off, you will get nothing but noise. On the other hand, if you set the trim high and also the fader way down, possibilities for distortion are much higher.
-If you would like to extend the volume of a signal, you must reach for the channel fader, not the gain knob.
-Every mixer is totally different, however, this is typically where the signal turns from green to yellow or orange. simply ensure you keep it out of the red!
-To set the gain for a channel, have the musician begin playing their instrument, and with the channel fader down, slowly turn up the gain knob and keep signal below yellow light on the mixer
-After setting the levels on the preamp, slowly bring up the channel fader until the instrument is at the suitable volume.
-For loud environments like noisy clubs, concerts etc., close mic-ing is usually the proper way to achieve the most from your sound source.
Gain structure
Also called “gain staging”, it refers to the manner in which signal levels are set between the various mics/instruments in the mixer. When you understand the gain structure, you’ll be on a good way to satisfy the most demanding musicians whether in a church setting or secular setting.
Achieving an acceptable gain structure is relatively straightforward, however, requires carefully hunting every input channel to set the gain (or trim) for the preamp stage in order that only the acceptable amount of signal is sent into the mixer. precisely how to do that depends somewhat on the mixer being used. a typical approach is to send the channel slider at center (0dB), and modify the input gain on every channel whereas that channel is being used at the amount it’ll be during the performance (by having the artist sing or play into it) therefore on have led meters on the mixer show 0 dB. It is often best to regulate the channel eq at this point also since this affects the amount from that input reaching to the mix.
There are many ways to measure the input level. sadly most compact mix consoles don’t offer a meter for every channel, however, they typically feature a switch known as PFL or Pre-Fade Listen – click here to learn about the HPF button on a mixer. Generally, pressing this button on the channel temporarily switches the mixer’s main meter to point out the chosen channel’s level before that channel’s fader. modify the gain or trim knob while looking at the meter. You should raise the amount until the meter reads “0,” however keep in mind that alternative microphone signals could create it into the audio “plumbing” during the mix thus you must leave a headroom by PFL’ing the signal at roughly -7db to -5db.
This way, once you start combining signals, you will not overwhelm the main mix. Adding eq can probably change the signal level, therefore you should leave space for that also. If you have the trim all the way down and also the PFL signal remains more than “0,” use the channel’s Pad switch; this may lower the sensitivity of the mic preamp by a fixed amount, reducing the chance of distorting the signal.
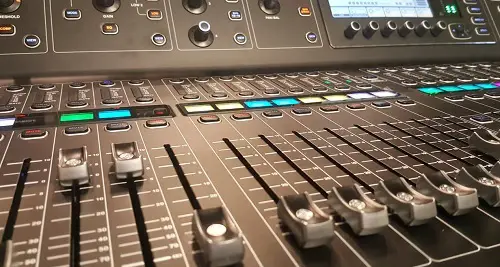
Sound consoles
*Since some consoles have additional headroom than others, you’ll need to experiment to examine however far you’ll be able to push the trim before distortion happens.
Once the gain is ready, you can bring up the channel fader to listen to the signal. at least some of the channel faders ought to be at or close to the “0” mark; if all the faders are very low or very high, something is wrong. If setting the master at “0” makes the volume in the space too loud, flip down the level controls on the power amp(s). If you would like to bring the master fader all the way up to induce adequate volume within the room, either the power amps are set too low or your system is underpowered.

Using different instruments
Vocals
Setting up a mic for vocals starts with choosing the right mic for the job- the mic that will do the perfect job of strengthening the voice and carrying it as far as possible. Of course, there are various mics which can be used, some of which includes the Shure KSM9, Shure SM58, Audix OM5 amidst many others. You should choose a microphone that suits your voice color/tone.
After you’ve connected your mic, (I recommend that you do this when your mixer is on standby, or at least it is required to reduce the channel’s fader to 0) then you should set gain of this channel. How are you going to do this? Simply sing or talk as loud as you will on the performance and slowly raise the gain knob.
Make sure the LED indicator does not reach the yellow, and not at all red light. Next is setting the console’s input fader level. This is done by pushing the fader(s) to a certain level but I do not recommend over 0. Then other elements such as the high pass filters, equalization, de-essing and reverbs are added. The high pass filters allow one to control the lower end of the mix and therefore should be tampered with carefully. A filter having an average of 112hz can be used for a male’s vocal while 120hz is advised to be used on females. Equalization also helps to remove the unwanted noises and make an adjustment while compression and de-essing help to trim and reduce offensive frequency respectively.
*Note that any additional tweak will affect the output signal strength. Click here to read about reverb and delay on live vocals.
I just want to take a minute about a great video course I discovered over at CreativeLive that teaches you how to mix live audio. The course is taught by Zach Varnell who was chief engineer at Harbor Studio in Seattle and Tacoma’s Spectre Studios. He has many years experience as a sound engineer working in both the studio and live concerts. This is a terrific resource and I cannot recommend it highly enough. If you want to check out the lesson plan, just click here.
Acoustic guitar
The type of mic to be used for transmitting the sound of the guitar matters a lot; however, the positioning of the guitar to the mic matters more. When considering the mic for the guitar, frequency, and accuracy of the mic should be put into consideration. This is because a high frequency and highly accurate mic is preferred. Omni-directional mics and directional mics may be used for staging an acoustic guitar. If you are not ready to spend a lot of money, Audio-Technica ATM450 will greatly do the job. And if you are a hobbyist but you want a professional recording/audio signal, the best choice is definitely one and only Shure SM57.
When positioning the guitar, the mic should be placed in such a way that it is between the fretboard and the sound hole of the guitar. This will allow the mic to easily capture all sounds made from the various sources of the acoustic guitar. Note that directional mics can ignore other sound sources thereby focusing on the sound of the key instrument while omni-directional mics see to it that proximity effect is not absent from the sound. Therefore, my advice would be: bring mic closer to the guitar when using a directional mic.
Setting mic gain for an acoustic guitar is very similar to vocals. Hit the guitar strings intensely, hold the signal below the yellow (-3db if you’re recording in DAW), enjoy playing.
Drums
Proper mic-ing of the drum kits invariably leads to a great sounding live set on stage. Therefore, to give the audience the best performance, a good drum mic-ing is essential. When performing on a stage, several mics are needed for various parts of the drum.
In order to achieve the best possible sound, each drum kit component should have its own microphone. Except cymbals (crash, ride, splash etc), their sound is captured by the overhead condensers.
When selecting a mic for the kick drum, it should be a mic with a large diaphragm while the one for the snare and hi-hats should be an omnidirectional dynamic mic and should be pointing at the middle. For the placement of the overhead mics though, any mic which can stay above the kit and pick up sounds easily without allowing sounds from the environment to interrupt will do. Dynamic microphones will also do for the toms. To receive more impact from the bass drum, the mic is best placed outside the drum. In the end, with so many mics, it turns out that the drums are most difficult instrument for mic-ing. That’s definitely true.
Basically, the rule stays the same, hit the drum component strongest you will hit it on gig and keep LED light below yellow. Simple, right? Let’s do it for another 6 drum microphones.
Guitar amp
Considering mic for electric guitar amps requires one to choose a good dynamic. It should be easily be mounted about 4 inches in front of the amplifier. They are positioned in such a way that they are at the center of the speaker to receive the highest direct sound. Positioning a mic for a guitar amp is based basically on the distance and angle. If a closer angle is desired, mics with sound pressure levels should be gotten, to avoiding popping. Most dynamic even do not need mic stands and can easily be parked in front of the guitar amplifier. However, if you are looking to get a mic with high frequency, the dynamic mics lack in this area. Their frequency ranges are quite small and even more prone to mechanical noise.
Too much gain on a microphone on an electric guitar amp can easily cause additional distortions. Keep gain down the most you can.
Check out my other post – 15 Great Products For Church Sound Systems

Leave a Reply