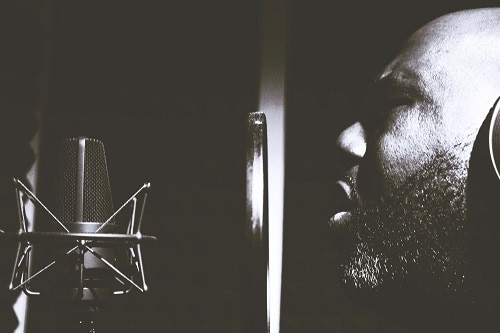
In every professional recording studio, and many bedroom studios, you can expect to see a pop filter, or pop shield, attached to a microphone stand. For most vocalists and producers, this tool is essential to obtain a distortion-free recording with professional sound quality. With lots of options on the market, (not to mention microphones), where does one begin to comprehend this device and how effective it can be.
Why attach a pop filter?
Let’s begin with the function of a pop filter. Without one, a vocal or speech recording may be subject to unwanted microphone noise, such as plosives or ‘pop’ sounds. These happen during the recording process when an excessive amount of sound waves hit the diaphragm inside the microphone. In other words, when too much air is blown into the microphone. The pop filter’s function is to reduce the air velocity which enters the mic and helps to deliver a clean and undistorted recording. In the music industry, plosives, pop sounds, sibilance and clipped recordings are seen as very unprofessional. You might also be interested in my post on how to remove fan noise on a microphone.
A pop filter is not to be confused with a windscreen, which instead reduces the sounds signal rather than the air hitting the diaphragm inside the microphone.

Recording vocals
If you record an audio signal using a DAW, you can clearly see if pop sounds or plosives have occurred. A plosive within an audio recording would have a clipped waveform, however, audibly, the result would be an intrusive pop sound with a noticeable distortion. Many plosives also create an aggressive low-end sound which is why it’s necessary to make sure these sounds don’t make it onto the recording. If you end up with an audio recording littered with plosives, the best idea would be to start from scratch and re-record. It’s always better for a vocalist or interviewer to have a clean signal on the original recording as desired effects can be added after in the post-production process. Live events that require microphones would work in a similar way. To avoid any sound clippings, you can use a pop filter or windscreen during a live performance suppressing any wind or outdoor noises.
Shield distance set up and where to place a filter
Before installing, you should to consider where to position the pop filter. For professional results, the mesh should be between 1 or 2 inches away from the mic. With this in mind, the vocalist or speaker should aim to be 7-8 inches away from the pop filter. This is to ensure that the air is still widely dispersed after the sound has travelled from one’s mouth, though the mesh filter before being piked up on the audio signal. If the pop filter is any closer to the grille of the microphone, or if the vocalist is singing directly against the filter, it may interfere with the sound quality and cause additional ‘popping’ sounds. Read more on what is a pop filter used for?
Once the microphone is set up, you can attach the pop filter to the mic stand which usually has a bolt or screw mechanism. It is a good idea to set up the pop filter with the neck facing upwards. If the pop filter is positioned on an angle, the unnecessary weight on the mic stand may disrupt the recording or get in the way of any cables.

Leave a Reply