Many churches have been making recordings of sermons, live events, and worship services for a long time. Back in the day, you may have recorded onto cassette tape or onto CD, to be made available to people who perhaps aren’t able to get out to church. Now in the age of digital audio, a whole host of opportunities have been opened up, such as being able to download an mp3 file from a church website, or subscribe to a worship podcast on iTunes, sermon podcasts, or even listen in on Youtube or Facebook live.
If you are thinking of making church audio recordings of the sermon and/or whole worship service for the first time, or you are planning to upgrade from analogue or direct CD recording, then I hope this post will be helpful to you.
I’m going to split this up into two parts, first looking at live sound recording with a handheld device, first the sermon audio only and then the whole service, and secondly how to record from a mixing desk. I also cover how to use some free recording and editing software to get your audio reading for podcasting or transfer to CD.
Now how you approach this will depend on your setup and perhaps budget and technical expertise too.
The simplest way to do this for good results, I think is to use a portable handheld digital recorder.
Digital audio recorders
There are a number of different manufacturers that produce these such as Marantz and Tascam, but I personally use the Zoom H2N which has a built-in mic and the sound quality is excellent and is very easy to use. I’m actually on my second one and have the recently upgraded version. It’s definitely worth thinking about if you are looking for just voice recording equipment and don’t need to record music from your service.
Most of these low-cost portable digital recorders are stereo only, although the one I use is a 4-channel quadrophonic model i.e. it records sound across 360 degrees. They also typically come with some form of removable storage, usually a SmartMedia card, which allows recordings to be read from a USB card reader and transferred to a computer. These devices are great for sermon audio or a whole church service, including a worship team.
Some also have micro USB connectors so that you can connect to a PC or laptop directly.
Suitable external microphones
Another option if using a portable device is that on most models, you can plug in an external microphone. One model that is popular among churches is the CA14 cardioid microphone. Another is the Shure MVL which is a high-quality lavalier mic. There are of course many other mics and some that are perhaps better if you are also recording video, such as the Shure MV88 microphone.
Sermon recording setup
To capture church service audio, position the recording device just below face height of the preacher if possible up to 2 feet away – you might want to check out my church audio guide here. Check that the sound level is not too high for the “hell, fire and brimstone” parts and not too quiet for a more conversational style. You can, of course, do something about volume levels in post-processing, but if you can get the recording level correct up front, it will help reduce noise and just result in better all-around audio.
For speech, a fairly low bit rate is ok for sound quality, as the spoken human voice has a lower frequency range than music typically. A male voice has a frequency range for speech from about 80Hz-300Hz and for a female, 150-400Hz. Of course, the human voice is also rich harmonically, so to get a high-quality sermon recording you do need a wider bandwidth than 400Hz! As a comparison, a telephone has an 8KHz bandwidth and CD quality music has a 44KHz bandwidth. [1]
As far as bitrate is concerned I would tend to use 44KHz bandwidth, 64kbps for mono speech and for stereo to maintain the same quality, 129kbps. If you want a higher-quality mono recording of your pastor, then you can also do that at 128kbps for excellent results. It just so happens that these are also the bitrates recommended by the BBC for podcasting, and I think they know a thing or two about voice recording. For sermon podcasting, these settings should give good results, assuming you are using a quality microphone and a good recording device.
Most recorders use MP3 file format as standard, but you may also be able to select different file formats such as WAV and WMA.
A handheld recorder like this works really well for sermons, and of course, you also have the advantage that as it is portable, it can be used for recording midweek meetings or events that take place out with your main worship area. And it is also ideal for people who don’t have a permanent church building and you are setting up and tearing down all your sound gear for every Sunday service.
If you are interested in in-ear monitor systems, click here to read more
Worship music production
If you want to capture the church services in their entirety, rather than just church sermons, then you need to think carefully about where you place the portable recorder. If your audio capture device has 4-channel recording from front and back microphones, then it is a bit easier. If you want to pick up the singing in the church service, instruments as well as the preaching, then you probably want to place the recorder about halfway between the pulpit and the congregation.
This will take a bit of trial and error as you can either end up with the preacher singing really loudly, or the front row of the congregation singing loudly, but you then can’t hear the preaching. If want to record live church music with the organ or piano too, it might be better to use a separate microphone or recorder as these instruments may be a lot louder than the congregation. Also if you want to record the church choir, you can do it with a multidirectional device such as the Zoom H2n or use more than one microphone to get the great sound coverage.
How to Record to a computer from a mixing desk
Ok, another way that you could record the sermon would be to use a laptop or desktop PC to record from a mixer. If you already have a PA sound system setup with a soundboard and a laptop, you have most of the equipment you will need to make a quality recording. You can take an output from the desk to the line in on the laptop, but this won’t really give great results, as built-in laptop audio circuits tend not to be high quality. It will work, but you would be much better off investing in a USB audio interface that has 1/4″ jack and XLR inputs, which you will be able to use in other scenarios too.
Some USB audio interfaces that have a good reputation are the Focusrite Scarlett 2i2 (which comes with ProTools recording software), or the Tascam US 2×2(I believe this one come s with Ableton Live lite) and the M-AudioM-Track 2×2 interface(comes with Cubase LE software). All of these are pretty good and not too expensive. Just be aware that some of these units might require a USB 3.0 interface, so that’s something you should check first. Some older units might have a firewire option, but firewire is pretty much obsolete now. Read more here about the Focusrite 2i2 vs Presonus Audiobox USB sound interfaces.
Software
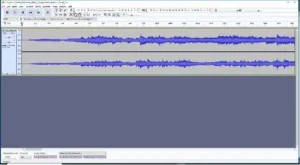
The next thing is to get your software installed. There are some good audio editing software tools out there such as ProTools, Cubase and Ableton, which all have great features, but can have a steep learning curve and have far more functions than we really need. These tools are commonly called a DAW or digital audio workstations. You may receive some software with your audio interface or soundboard, but there are simpler alternatives worth considering. For simply recording the sermon or even if you are recording the whole service, there is a program called Audacity which is more than able to do the job. Audacity is definitely among the easiest to use recording software for church services that I have used.
Audacity is open-source editing software, so it is free and comes with a whole host of post-processing functions. You can edit and crop unwanted parts of a recording, add some bass, normalize volume levels and then save the files in any number of audio formats including MP3 and WAV and saves to your computer hard drive. You can also make your own multitrack recordings with Audacity if needed and do an audio mix of the tracks. Audacity is also great for easily removing background noise from sermon audio.
It is available for Windows 7/Windows 10, Apple iOS and Linux and you can download it here -> https://www.audacityteam.org
Test out your software with the audio interface and just a microphone before running it through the mixing desk. If there is a problem later on, you want to eliminate other possible issues first before plugging it into the sound desk.
Once you have that working and you are able to record and save a sound file, then go on to use it with the mixer board. Take an auxiliary output from the desk and plug it into the audio interface(probably going to be a 1/4″ jack-to-jack cable you will need).
Getting gain levels right
It’s worth doing a test run with the recording interface setup. If you have someone who can speak into the microphone while you are working on the desk and laptop, that would be ideal. Something to check is that you want your levels to be adequate but with clipping. Get your ‘stand-in’ preacher on the mic to try and project their voice into the microphone and if the sound level indicator in audacity is red, then you are clipping. You might also be interested in my post about how to set gain on a mixer.
You can either turn down the audio level inside Audacity or use the level control on your USB audio interface. Ideally, you want your highest peaks to be no more than -3dB. If you have an audio track that is too quiet, there is always something you can do about that, but if you have a recording that is distorted, no amount of post-processing is going to fix it.
Once you have finished recording you may want to play around with some of the post-processing and filters, but once you are happy then export to MP3 or whatever format you like. Make sure you save it at a decent bit rate. You may want to have two versions, one WAV version as the raw audio and then an MP3 version. The advantage of this is that if something goes wrong with post-processing or editing, then you still have a copy of the original WAV file on your computer which will have much better quality audio than the mp3.
If you want to get the whole service, if all your music is coming through the desk too, then you just follow the same process for recording the sermon. Now, what kind of results you get from this will be determined by your mic setup and sound system, which is too big a subject to cover in this post. However, if your piano/keyboard, instruments, and singers are going through the desk anyway, it should be fairly straightforward.
Something else that is worth considering if your laptop or PC doesn’t already have one, is a USB SmartMedia computer interface. This is very useful if you have other folks on your worship tech team who can take the raw audio file and do editing for you. Also for those who might be doing your church website or uploading MP3 for podcasting. Another way of doing this is to set up a Dropbox folder to share all your audio files with your church ministry team.
Mixing to CD
It is also possible to record directly to CD using a CD recorder, by taking an output from your mixing console, and much of the general principles I have already outlined are still applicable to this method. These devices aren’t as popular as they once were, due to computer recording, but they are still a good solution for live sound capture. Also, if you aren’t planning on doing much editing or post-processing, it could be more convenient for distribution or making copies. The rewritable discs are also very inexpensive which is a bonus.
Other methods
Mobile phone
This is probably the most low-cost method of all, and the simplest too. Most people these days have access to a phone that can capture pretty decent audio. You can use the built-in mic or use a Lavalier microphone which is probably the better option as it will be much nearer to the person speaking and you can cut out more background noise for better audio clarity.
If you have any questions please leave a comment below.
Leave a Reply